Curing is the single most important factor determining concrete’s long-term durability, surface hardness, and resistance to scaling, dusting, and fine cracking. Yet it’s also the most commonly misunderstood and neglected part of concrete work.
Many homeowners assume concrete is “done” once finishing is complete. They’re wrong. What happens during the following days determines whether their slab performs well for decades or develops problems within months.
Curing isn’t complicated magic—it’s simply managing moisture and temperature so cement can complete its chemical reaction with water. This reaction, called hydration, happens naturally when conditions cooperate. When interrupted by rapid drying, extreme temperatures, or premature loading? You get weak surface layers that dust, scale, and crack despite feeling hard to the touch.
This guide explains what curing actually means, what environmental factors affect it most, and simple DIY-friendly practices that dramatically improve results. No specialized equipment. No excessive effort. Just understanding the basics helps you avoid the mistakes that compromise concrete performance.
Quick Answer
Key concept: Curing isn’t the same as drying. Curing needs moisture. Drying removes it. They’re working against each other.
Curing means maintaining conditions that allow concrete to gain strength through continued hydration. Drying means losing moisture, which stops hydration and leaves concrete weaker than it should be. The fundamental goal? Keep moisture in the concrete long enough for the cement to react fully, developing the strength and durability you’re paying for.
Quick method comparison:
🛡️ Best simple method
Plastic sheeting—inexpensive, effective, minimal attention needed
☀️ Best for hot/windy
Curing compound or well-sealed plastic—handles tough weather
⭐ Best results
Continuous moist curing—optimal strength if you can maintain it
The most critical factors? Preventing the surface from drying too quickly—especially from sun and wind—and avoiding any abuse or loading before the concrete has gained adequate strength.
Surface moisture evaporates faster than you’d expect in hot, dry, or windy conditions. This rapid drying creates a weak surface layer prone to dusting, scaling, and fine cracking. Even though the concrete feels hard.
Simple curing methods work well for residential projects. Covering with plastic sheeting keeps moisture in without constant attention. Light misting or wet burlap maintains surface moisture for better strength development. Curing compounds seal the surface to prevent evaporation when other methods aren’t practical.
Choose the method that fits your project size, weather conditions, and how much ongoing attention you can provide.
❌ What doesn’t work:
- Assuming concrete is done when finishing is complete
- Letting sun and wind dry the surface rapidly
- Walking, driving, or placing loads too early
- Adding water to “revive” workability—this only weakens the top layer
Browse Pre-Calculated Slab Sizes
See concrete quantity estimates for common dimensions with project planning guidance.
Curing vs Drying (What’s the Difference?)
What “Curing” Actually Means
Curing is the process of maintaining adequate moisture and temperature so cement can undergo hydration—the chemical reaction between cement and water that makes concrete hard and strong.
Here’s what most people get wrong: they think the reaction finishes when concrete feels hard.
It doesn’t.
Hydration continues for an extended period as long as moisture remains available and temperature stays within a range that supports the chemical process. When cement particles react with water, they form new compounds that bind the aggregate together and create concrete’s strength.
This takes time. If concrete dries out before hydration is substantially complete, the reaction stops prematurely. The result? Concrete that never reaches its potential strength, particularly in the surface layer where drying happens first.
💡 Think of it like this:
Hydration is like baking bread. The oven needs to stay at the right temperature for the full baking time. Pull the bread out early and you get dough inside even if the crust looks done. Similarly, letting concrete dry too soon leaves it weak internally even if the surface feels hard.
The hardness you feel early on doesn’t mean hydration is complete—it means the reaction has progressed enough to create initial strength. But continued hydration would develop much more.
Proper curing doesn’t add anything magical to concrete. It simply protects the conditions needed for the chemical reactions you already paid for when you ordered the concrete. Those reactions happen naturally if moisture and temperature cooperate. Curing is about not interfering with this natural process through premature drying or temperature extremes.
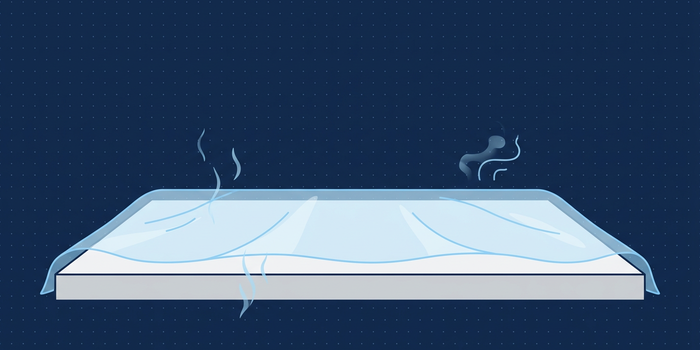
Why “Dry to the Touch” Can Be Misleading
Concrete can feel hard and dry on the surface within hours of placement. But this surface hardness doesn’t indicate that curing is complete or that the concrete has developed its full strength.
Initial hardening happens relatively quickly as cement begins reacting with water. This gives a false sense that the concrete is “done” when in reality the critical hydration process is just beginning.
The surface dries and hardens faster than the interior. You get a situation where walking on concrete might not leave visible footprints, leading people to assume it’s ready for use. But deeper hydration continues, and the surface layer hasn’t developed the durability it needs for long-term performance.
This premature surface drying is exactly what proper curing prevents.
Surface feels hard ≠ Done curing
Initial hardness is just the start. Hydration continues for much longer. Premature drying stops strength development.
Proper curing = Full strength
Maintaining moisture allows complete hydration throughout the thickness, developing the strength you paid for.
When you maintain surface moisture through covering or misting, you’re not trying to keep concrete from hardening—hardening happens regardless. You’re ensuring that as it hardens, the chemical reactions that create strength and durability continue throughout the concrete thickness rather than stopping at a weak surface layer.
The distinction between feeling hard and being properly cured matters enormously for long-term performance. Concrete that dried too fast may seem fine initially but develops problems months or years later—surface dusting, scaling in freeze-thaw conditions, faster wear under traffic, reduced resistance to weathering.
These problems trace back to inadequate curing that left the surface layer underdeveloped.
Don’t judge curing completion by surface feel. Follow proven curing practices for the appropriate duration regardless of how the surface looks or feels.
What Affects Curing the Most
The Big 4 Environmental Enemies
☀️
Sun
💨
Wind
🌡️
Heat
🏜️
Dry Air
Sun + Wind (Surface Dries Fast)
Direct sunlight and wind are the primary enemies of proper curing. They accelerate surface moisture evaporation far faster than concrete can tolerate without damage.
The combination is particularly destructive. Sun heats the surface, raising evaporation rate. Wind continuously removes the humid air layer immediately above the concrete and replaces it with dry air that pulls even more moisture out.
How fast can evaporation happen? In hot, dry, windy conditions, the surface loses moisture faster than water can migrate up from below to replace it.
This creates immediate plastic shrinkage cracking—fine surface cracks that appear while concrete is still plastic and finishing is underway. These are different from structural cracks that develop from settlement or loading, but they’re still defects that compromise appearance and surface durability.
Even after initial set when plastic shrinkage is no longer a concern, rapid evaporation continues damaging concrete. It stops hydration in the surface layer. The dried surface zone never develops proper strength or durability. It becomes the weak layer that dusts under traffic, scales in winter, and wears away faster than properly cured concrete would.
Protecting concrete from sun and wind during the initial curing period is one of the most important—and most neglected—aspects of residential concrete work.
Commercial contractors understand this. They routinely shade and cover fresh concrete. Homeowners often don’t realize the problem exists until they’re dealing with a dusting, scaling, or rapidly wearing surface months after placement.
Temperature Swings
Temperature affects the rate of hydration. Higher temperatures accelerate the reaction. Lower temperatures slow it down. And extreme temperatures in either direction create problems.
Hot conditions make everything happen faster: concrete sets quickly, evaporation accelerates, finishing becomes more difficult. The rapid hydration in heat can actually be problematic because it happens so fast that proper concrete placement and finishing becomes difficult. Plus the accelerated evaporation creates moisture loss problems despite the faster reaction.
Cold temperatures slow hydration dramatically. Very cold conditions can essentially stop hydration. If concrete freezes before it has gained adequate strength? Ice formation can damage the developing structure permanently.
This is why cold weather concreting requires special precautions—heating, insulation, or special mix designs that maintain workable temperatures during the critical early strength gain period.
Temperature swings between day and night also stress concrete during curing. Large temperature changes cause expansion and contraction that can create stress cracks in concrete that hasn’t gained enough strength to resist these forces.
This is particularly relevant for slabs poured late in the day that experience significant cooling overnight. The temperature drop induces contraction stress that can crack weak early-age concrete.
Moderate, stable temperatures produce the best curing conditions. When temperatures are extreme or highly variable, additional curing precautions become necessary. This might mean more aggressive moisture retention methods, insulation to moderate temperature swings, or timing pours to avoid the worst temperature conditions.
Low Humidity / Dry Climates
Low ambient humidity increases evaporation rate. It makes moisture retention during curing more challenging.
In humid climates, the air already contains substantial moisture so evaporation from concrete happens relatively slowly. In dry climates? The moisture gradient between wet concrete and dry air is steep, driving rapid evaporation that’s difficult to control without active curing measures.
Dry climates also tend to have clear skies with intense sun and often significant wind—the triple threat that creates maximum evaporation stress.
Concrete poured in these conditions absolutely requires deliberate curing protection. Simply finishing and walking away guarantees surface problems.
The particular challenge in dry climates is maintaining surface moisture. Misting may need to be more frequent because the moisture you apply evaporates quickly. Plastic sheeting needs to be sealed well because any gaps allow dry air to wick moisture away.
Curing compounds become attractive options in dry climates. They provide continuous protection without the labor of frequent misting or the challenges of keeping covers in place in windy conditions.
Slab Size and Thickness
Large surface area relative to thickness creates more severe curing challenges. There’s more surface area losing moisture relative to the volume of concrete containing that moisture.
A thin, wide slab has high surface-to-volume ratio. This geometry makes the entire thickness vulnerable to drying effects. The surface layer that dries first represents a larger proportion of total thickness in thin slabs compared to thick slabs.
Large slabs also develop more significant temperature-related stress. The surface exposed to sun can become much hotter than the shaded bottom, creating temperature gradients through the thickness that induce stress. Wide slabs have more potential for differential shrinkage between edges that dry faster and centers that retain moisture longer.
These factors don’t mean thin or large slabs can’t be cured successfully—they mean these geometries require more attention to curing practices.
You can’t rely on thermal mass or moisture reserves to buffer against marginal curing practices. Thin slabs need active moisture retention and temperature control to develop proper surface strength and durability.
The more challenging your site conditions—hot, dry, windy, large thin slabs—the more important deliberate, aggressive curing practices become.
Best Practices (Simple, DIY-Friendly)
Keep Moisture In (The Core Rule)
Every effective curing method works by keeping moisture in the concrete rather than letting it evaporate freely.
The specific technique matters less than achieving this fundamental goal. Choose methods that fit your project scale, available materials, weather conditions, and how much ongoing attention you can provide.
Three Proven Methods
Plastic Sheeting
Most practical for DIY. Use thick construction poly, lay it over the surface after finishing, weight edges securely. Check periodically that wind hasn’t disturbed it.
✓ Best for: Most residential slabs
Wet Burlap / Misting
Excellent results but labor-intensive. Keep burlap wet continuously or use sprinkler/soaker hose. Don’t let it dry out and restart—cycling wet-dry can be worse than no curing.
✓ Best for: When you can maintain continuous moisture
Curing Compound
Liquid membrane that seals surface. Apply immediately after finishing. Ideal for large areas or hot/dry/windy conditions. Check compatibility if you plan to seal later.
✓ Best for: Challenging weather or large scale
Protect the Surface from Abuse
Concrete gains strength progressively during curing. Subjecting it to loads or impacts before adequate strength develops can cause permanent damage.
The early stage when curing is most critical is also when concrete is most vulnerable to mechanical damage.
Walking on it leaves marks if done too soon. Dragging objects gouges the surface. Vehicles create indentations or cracks if driven on prematurely.
🚫 Avoid ALL traffic during initial curing:
👣
Foot traffic
🐕
Pets
🔧
Tools
🚗
Vehicles
Avoid all traffic on fresh concrete during the initial curing period. This includes foot traffic, pets, equipment, tools, and definitely vehicles. Even light foot traffic that doesn’t leave obvious marks can damage the surface layer enough to reduce its long-term durability.
If you absolutely must access the area? Place sturdy boards or planks to distribute weight and protect the surface.
Vehicle traffic requires much longer strength development before it’s safe. Passenger vehicles shouldn’t drive on residential concrete until adequate strength has developed. Heavy vehicles need even more time.
Turning wheels while stationary—the stress of steering while parked—can damage even relatively strong concrete. Avoid this completely during the curing period and minimize it even after concrete is fully cured.
Construction equipment, dropped tools, dragged materials—all these create impact and abrasion stress that can damage curing concrete.
Plan your project sequence to avoid needing to work over fresh concrete. If subsequent construction phases require access across new concrete, either wait until adequate strength has developed or provide substantial protection like thick plywood over dimensional lumber to distribute loads.
The temptation to use fresh concrete before it’s ready is strong because it looks done. But patience during curing pays back in decades of better performance.
Edges Matter
Slab edges dry faster than the interior. They’re exposed on multiple surfaces—top and sides—while the slab center only loses moisture from the top.
This faster edge drying can create differential shrinkage stress and leaves edges weaker if curing doesn’t account for this vulnerability.
Edges are also high-stress areas prone to impact damage. They’re frequently the first areas to show distress from inadequate curing.
Pro tip: When using plastic sheeting, extend coverage well beyond slab edges. Weight plastic securely at edges to seal them from air circulation. Edges need the same protection as the center—don’t neglect them.
When using plastic sheeting, make sure coverage extends well beyond slab edges so edges receive the same moisture retention protection as the interior. Plastic that only covers the top surface may not protect edges adequately. Weight plastic securely at edges to seal them from air circulation.
If misting, pay extra attention to edges making sure they receive adequate water. The same goes for curing compound—edges need full coverage just like the slab field.
It’s easy to focus on the large central area and neglect edges. But edges matter disproportionately to their small size because they’re where problems often appear first.
Don’t “Fix” Workability by Adding Water on Top
Adding water to the surface after concrete has begun setting—trying to extend workability or improve finishing—is one of the most damaging things you can do to concrete.
This surface water dilutes the cement paste in the top layer, creating a high water-cement ratio zone that’s inherently weak. The result? A weak surface layer that dusts, wears rapidly, and scales under freeze-thaw exposure.
⚠️ Critical distinction:
During Finishing = BAD
Adding water dilutes cement paste, weakens surface
After Finishing = GOOD
Misting maintains moisture for proper hydration
If finishing becomes difficult because concrete is stiffening, the solution is better timing and faster work. Not adding water.
If you’ve reached the point where finishing is difficult, accept that and work with what you have. Adding water might make immediate finishing easier but guarantees long-term surface problems.
This is different from curing. Misting or wet curing maintains moisture in properly placed and finished concrete. The distinction is timing and intent.
Adding water to extend workability during finishing dilutes the surface. Maintaining moisture after finishing preserves proper conditions for hydration. One damages concrete, the other protects it.
If Rain Happens
Light rain after concrete has set enough that the surface won’t be damaged is generally not problematic. It may even help curing by maintaining moisture.
The concern with rain is damage to the surface during the plastic period before initial set when raindrops can create pockmarks, or during finishing when rain can wash cement paste off the surface creating weak spots.
If rain threatens during or shortly after placement, have plastic sheeting ready to cover the slab quickly.
Support plastic off the surface if concrete hasn’t set enough to prevent marking—use stakes, chairs, or boards to hold plastic above the surface. Once concrete has hardened sufficiently that the surface won’t mark, rain causes no harm and the moisture may benefit curing.
Don’t try to finish or re-finish concrete when rain is falling on it. This incorporates excess water into the surface and washes away cement paste.
If you must work during threatening weather, plan to finish quickly and cover immediately. Accept that the finish may not be as refined as you’d like in perfect conditions. A slightly rough finish on sound concrete is far better than a “perfect” finish on weakened concrete.
If heavy rain did damage the surface before you could protect it, the damage is done. Additional surface working usually makes things worse.
In severe cases, the surface might need grinding or resurfacing after curing to restore appearance and durability. Prevention through weather planning and quick covering is far better than trying to fix rain damage after it occurs.
Curing Methods (Which One Should You Use?)
Quick Decision Guide
Typical DIY slab? → Plastic sheeting
Hot, dry, windy? → Curing compound
Want best results? → Continuous moist curing
Decorative/uniform color? → Wet curing or quality compound
Plastic Sheeting
Advantages: Plastic sheeting is inexpensive, readily available, easy to apply, and requires no ongoing attention once properly installed. It provides excellent moisture retention, works in any weather conditions, and doesn’t require water supply or specialized equipment.
For most residential slabs, plastic is the most practical curing method.
Disadvantages: Plastic can blow away if not adequately secured in windy conditions. It can leave marks on the surface if placed too soon before concrete has hardened sufficiently.
Plastic also creates uneven surface coloring if there’s moisture variation beneath it. Areas where condensation collects may cure differently than drier areas, creating blotchy appearance on slabs where uniform color matters.
Best for: Most residential slabs where appearance isn’t critical or where slight color variation is acceptable. Particularly good for garages, driveways, and utilitarian slabs. Works well in any climate and requires minimal ongoing attention.
Moist Curing (Light Watering / Wet Coverings)
Advantages: Moist curing provides ideal conditions for strength and durability development. Keeping concrete continuously wet produces the best possible hydration and strength gain.
It avoids any moisture variation issues and typically produces uniform appearance. Wet curing is the gold standard method when done properly.
Disadvantages: Requires continuous water supply and ongoing attention to maintain moisture. If wet coverings or misting are interrupted and the surface dries, cycling between wet and dry can be worse than no curing at all.
In hot dry conditions, maintaining continuous moisture is labor-intensive. Walking on wet surfaces to reapply water can leave marks. Water use may be a concern in drought conditions or where water costs are high.
Best for: Projects where you can commit to maintaining moisture continuously. Decorative concrete where color uniformity matters. Situations where you’re on-site anyway and can monitor moisture regularly.
Commercial work or important projects where optimal strength development justifies the extra attention.
Curing Compound
Advantages: Curing compound provides maintenance-free protection once applied. No wind problems, no monitoring needed, no water supply required.
Compounds work well in hot dry conditions where other methods are difficult. They’re ideal for large areas where covering is impractical. Application is quick and simple—spray or roll on and you’re done.
Disadvantages: Compounds cost more than plastic sheeting. Some compounds interfere with adhesion of sealers, coatings, or other treatments applied later—you may need to remove the compound before applying subsequent materials.
Over-application wastes money, under-application doesn’t protect adequately. Compounds require proper timing—too early and they don’t stay in place, too late and damage from rapid drying has already occurred.
Best for: Large slabs where covering is difficult. Hot dry windy conditions. Situations where you can’t provide ongoing attention. Projects where subsequent sealing or coating either isn’t planned or where you’ve verified compound compatibility with planned treatments.
Practical recommendation: For typical residential patios, driveways, and garage floors, plastic sheeting provides the best balance of effectiveness, convenience, and cost for most DIYers. Use wet curing if you’re committed to optimal results and can maintain it continuously. Choose curing compound when weather conditions make other methods impractical or project scale makes covering unreasonable.
Common Curing Mistakes (Checklist)
Avoid these frequent curing errors that compromise concrete performance:
- Letting wind and sun dry the surface unprotected: This is the most common and most damaging mistake. Fresh concrete left exposed to sun and wind dries rapidly, stopping hydration in the surface layer and creating weak, dusty surfaces that scale and wear prematurely. Always provide protection immediately after finishing.
- Not protecting edges and perimeters: Edges dry faster than the field because they’re exposed on multiple surfaces. Many DIYers cover the central area adequately but neglect edges, which then become weak points where problems appear first. Extend curing protection beyond edges and secure it well.
- Removing curing protection too soon: Impatience to use fresh concrete or simply forgetting about curing leads to removing plastic or stopping misting before adequate curing has occurred. Resist the temptation to remove protection early—the concrete looks done but hydration continues and needs protection.
- Adding water to the surface trying to revive workability: This dilutes the surface cement paste creating a weak layer that dusts and wears away. If finishing becomes difficult, work faster or accept reduced surface refinement rather than adding water to extend workability. Surface water is for curing after finishing, never for extending workability during finishing.
- Allowing early traffic or loading: Walking, driving, or placing loads on concrete before it has gained adequate strength causes permanent damage even if no marks are immediately visible. The damage manifests as reduced durability and earlier wear over the slab’s lifetime. Protect fresh concrete from all traffic and loading during curing.
- Letting plastic blow around unsecured: Plastic sheeting that flaps in the wind doesn’t protect moisture—it creates airflow that accelerates evaporation. Weight plastic thoroughly around all edges and check periodically that it remains secured. Wind protection is useless if wind lifts the protection.
- Assuming good curing fixes other problems: Perfect curing cannot compensate for poor base preparation, missing control joints, inadequate reinforcement, or wrong concrete mix. Curing is essential but it’s one element among several that determine concrete performance. Don’t expect curing alone to prevent problems caused by other deficiencies.
How Curing Connects to Cracks, Strength & Durability
Strength Gain vs Surface Durability
Curing affects both overall strength gain throughout the concrete thickness and the surface durability that determines how well concrete resists wear, scaling, and dusting.
While interior strength development matters for load-carrying capacity, surface durability often determines how concrete performs in daily use.
Think about it: a structurally adequate slab with a weak, dusty surface feels like failed concrete even if it supports loads without problem.
Where Curing Matters Most
Surface Layer
Most vulnerable to rapid drying
Interior Mass
Protected by its own moisture
The thin surface layer determines long-term satisfaction
The surface layer is most vulnerable to curing problems because it’s where moisture loss occurs first. When surface drying interrupts hydration, this top layer never develops the density and hardness it should achieve.
The result? Concrete that seems fine initially but wears rapidly under traffic, dusts under sweeping, scales in freeze-thaw exposure, and generally performs like weak concrete even though the bulk of the slab has adequate strength.
Proper curing ensures that the surface layer—the part that actually interacts with traffic, weather, and use—develops the same quality as the slab interior.
This is why curing matters so much for long-term satisfaction even when structural capacity isn’t a concern. The difference between properly cured and poorly cured concrete often appears at the surface rather than in load-carrying performance.
Think of curing as insurance for surface quality. The concrete interior may be fine regardless, protected by its own mass and moisture reserves. But the thin surface layer is entirely dependent on external curing protection to develop properly.
That critical surface layer determines whether you’re satisfied with your concrete ten years from now or dealing with dusting, scaling, and premature wear.
Curing Doesn’t Replace Joints or Reinforcement
Perfect curing cannot prevent cracks caused by settlement, thermal movement, or shrinkage stress that proper jointing and reinforcement would control.
Curing and crack control are related but different aspects of concrete performance. Both matter. Neither replaces the other. Neglecting either creates problems that the other cannot prevent.
Control joints provide planned weak points where shrinkage cracks form in straight lines rather than random patterns. Proper curing doesn’t change the fact that concrete shrinks and needs joints to control where that shrinkage produces cracks.
Similarly, reinforcement controls crack width and holds crack edges together, providing benefits that curing cannot duplicate.
The reverse is also true—perfect jointing and reinforcement don’t compensate for inadequate curing.
You can have optimally placed joints and properly positioned reinforcement, but if curing is neglected, the surface will still dust and scale. The concrete might not crack randomly, but it will develop surface durability problems that proper curing would have prevented.
⛓️
Concrete work is a chain
Strength equals the weakest link
Comprehensive concrete quality requires attention to all the fundamentals: proper base preparation, appropriate thickness for loads, correct reinforcement placement, well-planned control joints, proper mix design for conditions, and adequate curing.
Excellence in one area cannot compensate for failure in another. Each element contributes different protection against different failure modes.
Think of concrete work as a chain—strength equals the weakest link. Perfect curing with terrible base preparation still produces cracked concrete. Perfect base with neglected curing produces dusty, scaling surfaces.
Excellence requires competence in all areas, not perfection in one and neglect of others.
Tools & Size Pages
Calculate concrete needs for your project:
Slab Calculator
Purpose-built for rectangular slabs with guidance on thickness, reinforcement, and finishing.
Browse Common Slab Sizes
Pre-calculated estimates for standard dimensions—no math required.
General Concrete Calculator
Calculate volume for any project shape with waste factors and unit conversions.
For very small projects:
- Bag Calculator – Compare mixing bags versus ready-mix for small volumes
Frequently Asked Questions
Does curing mean keeping concrete wet?
Curing means maintaining moisture so concrete can continue hydrating and developing strength. Keeping it wet is one effective method but not the only one.
Wet curing through misting or damp coverings provides ideal conditions. Covering with plastic sheeting traps existing moisture preventing evaporation. Curing compounds seal the surface to prevent moisture loss.
All these methods work by ensuring moisture remains available for the hydration reaction. The specific technique matters less than achieving the goal of moisture retention. Choose the method that fits your project and conditions.
What’s the difference between curing and drying?
Curing and drying are opposite processes. Curing maintains moisture for continued hydration and strength development, while drying means losing moisture which stops hydration prematurely.
The confusion arises because concrete needs to “dry” eventually to be usable. But this should happen slowly after adequate curing has allowed proper strength development.
Rapid drying during the initial period prevents concrete from ever reaching its potential strength and durability. Think of curing as controlling the timing and rate of moisture loss rather than preventing drying forever.
You want moisture to stay in long enough for good hydration, then gradual drying is fine.
Can I cure with plastic only, or do I need water too?
Plastic sheeting alone provides effective curing by trapping the moisture already in the concrete and preventing evaporation.
You don’t need to add water if you cover with plastic immediately after finishing. The concrete contains adequate moisture from the mix water—plastic simply keeps it from escaping. This is why plastic sheeting is such a practical curing method for DIY projects.
However, in extremely hot and dry conditions or for large slabs where plastic coverage is difficult to maintain, supplementing with light misting before covering or using wet coverings instead may produce better results.
For typical residential slabs in moderate conditions, plastic alone works fine.
Will curing prevent cracks?
Proper curing reduces certain types of cracking—particularly plastic shrinkage cracks and some thermal stress cracks. But it cannot prevent cracks from other causes like settlement, missing control joints, or inadequate reinforcement.
Curing helps by allowing concrete to gain strength before stress develops and by reducing moisture-gradient shrinkage stress in the surface layer.
However, all concrete shrinks as it cures and as it dries long-term. This shrinkage will produce cracks unless control joints provide planned locations for those cracks to form. Similarly, settlement cracks from poor base preparation happen regardless of curing quality.
Think of curing as one element of crack control, working alongside proper jointing, base prep, and reinforcement rather than replacing them.
What if it’s hot and windy where I live?
Hot, windy conditions create the most challenging curing environment and require aggressive protection measures.
Plan to cover immediately after finishing—don’t wait. Use curing compound if covering is impractical for your project size or conditions. Have protection materials ready before concrete arrives so you can cover the moment finishing is complete.
Consider scheduling pours for early morning to avoid peak afternoon heat and sun. In extreme conditions, use windbreaks during placement and finishing to reduce evaporation stress.
Wet curing works well if you can maintain continuous moisture but requires diligent attention in hot dry wind.
The worse your conditions, the more important curing protection becomes and the less you can get away with casual approaches.
Can rain ruin fresh concrete?
Rain can damage concrete during finishing or in the first hours after placement before the surface has hardened. But rain on cured concrete is harmless and may even help curing.
The concern is rain washing cement paste off the surface before it sets, creating pockmarks from raindrops, or incorporating excess water into the surface layer weakening it.
If rain threatens, have plastic sheeting ready to cover immediately after finishing. Once concrete has hardened enough that the surface won’t be marked or washed by rain, the moisture actually benefits curing.
Heavy rain during the plastic period requires quick covering to prevent damage. Light rain after initial set is not a problem.
Should I seal instead of cure?
Sealing and curing are different processes that serve different purposes. Curing happens immediately after placement to develop strength and durability, while sealing happens later to protect cured concrete from staining, weathering, and wear.
You cannot skip curing and substitute sealing—the timing and goals are completely different.
Cure first, allowing adequate time for strength development. Then, if desired, apply sealer to provide surface protection against stains, moisture penetration, or deicing chemicals.
Some curing compounds are designed to remain as functional sealers, combining both purposes. If you use this type, verify it provides the protection you want. Otherwise, cure properly with plastic or wet curing, then decide later whether sealing makes sense for your specific application and exposure conditions.
How long should I keep plastic sheeting on concrete?
Keep protection in place through the early curing phase, especially while conditions are hot, dry, or windy.
Longer protection generally improves durability. If in doubt, leave it on longer rather than removing it early.
Once you remove plastic, gradual drying is fine—the goal is preventing rapid early moisture loss, not keeping concrete covered forever. Temperature, humidity, and mix design all influence optimal curing duration, so adjust based on your specific conditions rather than targeting a fixed timeframe.
What causes concrete to dust or powder at the surface?
Surface dusting—where concrete powder forms and comes off under traffic or sweeping—almost always results from inadequate curing that left the surface layer weak and underdeveloped.
When the surface dries too quickly, hydration stops before the surface gains proper density and strength. The result is a weak layer that never properly hardened. Walking on it breaks down the weak particles creating dust.
Other causes include adding water to the surface during finishing (which dilutes cement paste) or finishing concrete with excessive bleed water still present (which brings too much water to the surface).
Prevention is proper curing—protect the surface from rapid drying immediately after finishing. Once dusting develops, the damage is done. Surface treatments or hardeners can sometimes improve a dusty surface, but prevention through proper curing is far better.
Does curing compound prevent me from sealing later?
Some curing compounds interfere with adhesion of sealers or coatings applied later, while others are designed to remain as compatible sealers.
If you plan to seal concrete after curing, verify that your curing compound is either compatible with your planned sealer or can be removed before sealing. Manufacturers specify compatibility in product literature.
Many modern compounds are designed to be compatible with common sealers, but older formulations or certain types may require removal through grinding, sanding, or chemical stripping before sealing.
The safest approach is checking compatibility before using curing compound, or choosing plastic sheeting if you know you’ll want to seal later and you’re uncertain about compound compatibility.
Ready to Plan Your Concrete Project?
Disclaimer
This guide provides general information about concrete curing practices for typical residential projects. Specific curing requirements vary by concrete mix design, climate conditions, project specifications, and local practices. Always follow your concrete supplier’s recommendations for curing their specific mixes, consult local building codes for any required curing standards, and adjust practices based on your site-specific weather and environmental conditions. The information provided is for educational purposes and does not replace professional guidance for your specific project circumstances.